What happens when you type a URL into your browser? — The big picture (with Cloud)
What happens when you type a URL into your browser? — The big picture (with Cloud)
Have you ever wondered what happens behind the scenes when you type a URL into your browser? It’s a simple action that we often take for granted, but the journey from entering a web address to seeing a fully-rendered website involves multiple intricate steps. In this blog, we will demystify the process and shed light on the inner workings of the internet, exploring the key stages that occur when you type a URL into your browser. I will keep it as simple as possible with 3 parts:
-
What is in the URL?
-
What happens when you type a URL into your browser?
-
How we can use cloud services such as AWS/GCP/Azure, Terraform, Kubernetes, and Docker in this example?
What is in the URL?
The URL you entered into the address bar (for example, www.google.com or https://www.google.com) contains several parts:

Protocol (http/s):
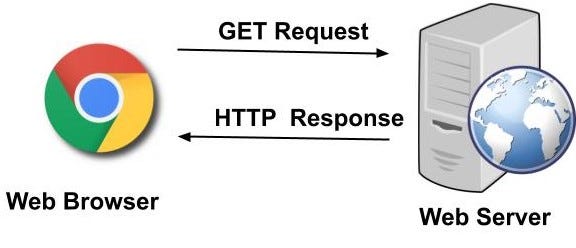
The protocol HTTP/S (Hypertext transfer protocol/secure). HTTP is the foundation of World Wide Web and is used to load webpages using hypertext links. HTTP is used to transfer data, such as text, images, and videos, between web servers and web browsers. We use GET and POST requests to get or post content to the desired webpages via HTTP protocol.
](https://cdn-images-1.medium.com/max/2000/0*6H7KLCpcmSPn_WQe.png)
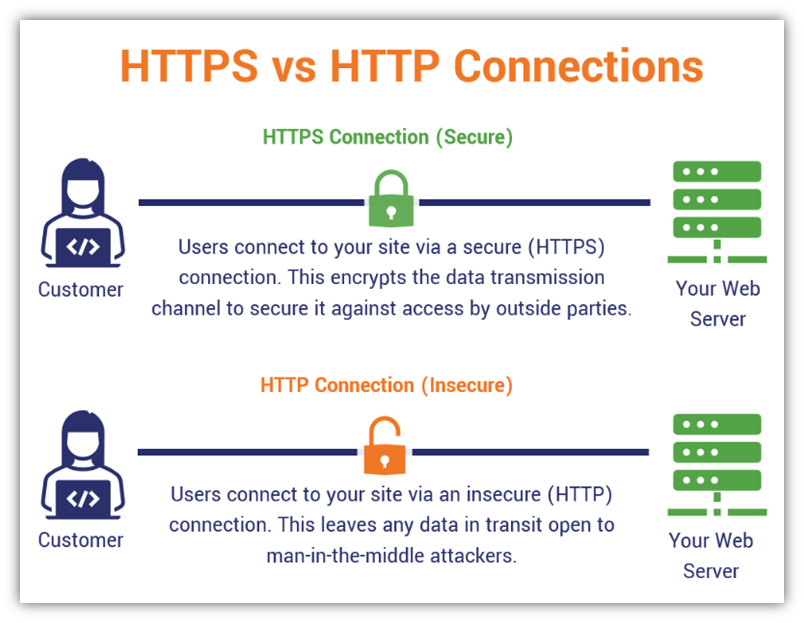
However, HTTP is a plain text protocol, which means that the data that is transferred between the web browser and the web server is not encrypted. This means that anyone who can intercept the data, such as a hacker, can read it. HTTPS is an extension of HTTP that uses Secure Sockets Layer (SSL) or Transport Layer Security (TLS) to encrypt the data that is transferred between the web browser and the web server. This makes HTTPS much more secure than HTTP.
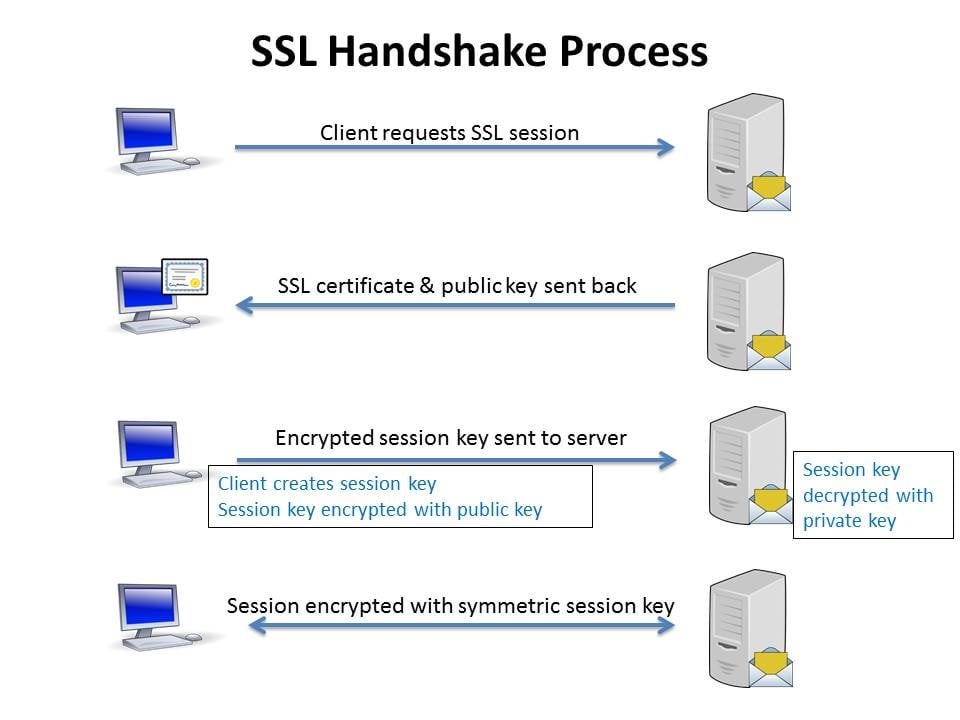
As for SSL and TLS, they work as below:
-
The client (e.g., a web browser) sends a request to the server.
-
The server sends back a certificate, which contains the server’s public key.
-
The client uses the public key to encrypt a message, which is sent back to the server.
-
The server uses its private key to decrypt the message.
-
If the message is successfully decrypted, then the client and the server can communicate securely.
DNS (www.google.com):
Do you know that every single URL like google.com has a unique IP address. For google.com, it is 142.251.32.46. So if you enter 142.251.32.46 into your address bar, it will return google.com site. DNS (Domain Name System) is like a phone book with a list of IP addresses and their corresponding URLs. When you enter an URL into the address bar, DNS will look for the correct IP address.
There are 3 parts in the URLs (without HTTP/S):
-
www (World Wide Web) is a protocol used to access websites that are hosted on the internet.
-
Domain name (google)
-
Top-level domain name (.com)
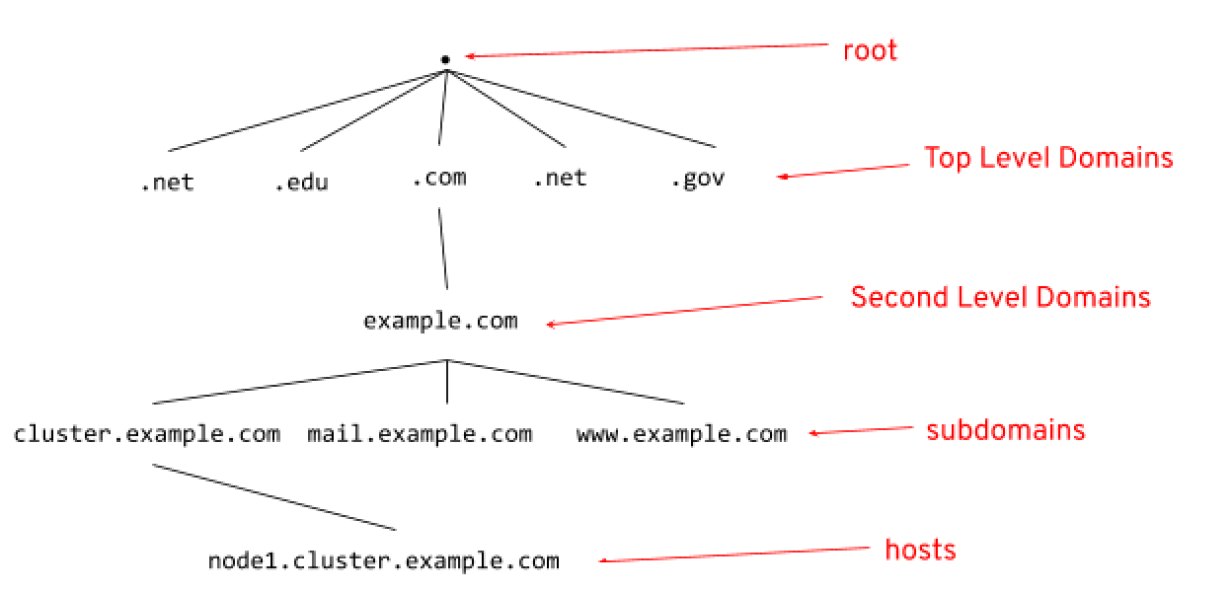
However, many website URLs we encounter today contain a third-level domain, a second-level domain, and a top-level domain.
-
Top-level domain are .com, .edu, .gov, etc.
-
Domain name (second-level domain) are google, wikipedia, etc.
-
Third-level domain are map.google.com for example
The root name server will redirect it to the .com domain name server. .com name server will redirect it to the [google.com](http://google.com) name server. The [google.com](http://google.com) name server will find the matching IP address for [maps.google.com](http://maps.google.com) in its’ DNS records and return it to your DNS recursor, which will send it back to your browser.
What happens when you type a URL into your browser?
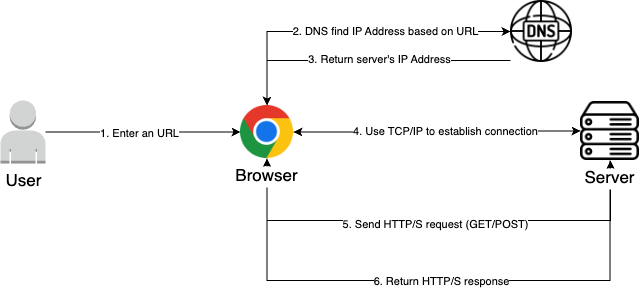
Okay, let’s go to the main part. When you enter a URL into the address bar:
- DNS will go look up the URL and find the correct IP address. Let’s say the DNS found the IP address for https://www.google.com is 142.251.32.46. This IP address will be return to the client’s computer.
TCP/IP (Transmission Control Protocol):
- This communication protocol will use the IP address we found to send the data to us. The client computer opens a TCP connection the server computer at the IP address we found. Then, to put it simple, our client computer sends a request to the server computer and the server computer retrieves the data back to our server computer (the website). That’s how you get all the front-end data (for example, index.html) of the website.
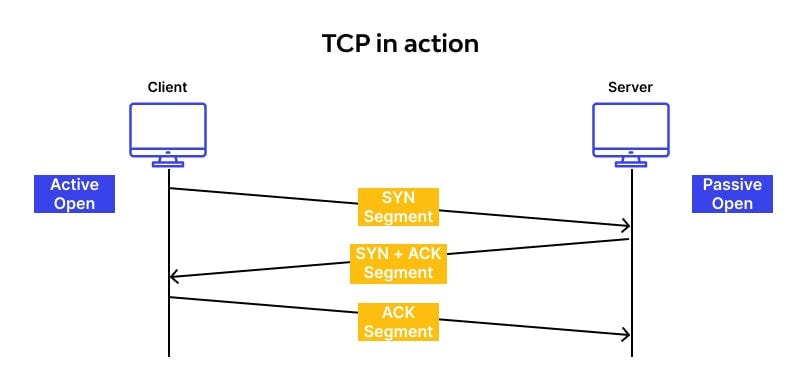
For those curious in how TCP/IP works in-depth, TCP works in the three-way handshake process:
-
Step 1 (SYN): The client wants to establish a connection with a server so it sends a segment with SYN (Synchronize Sequence number) which inform that the client wants to establish a connection to the server.
-
Step 2 (SYN + ACK): Server responds to to the client request with SYN-ACK signal bits set. ACK (acknowledgment) signifies the response of the segment it received and SYN signifies with what sequence nuymber it is likely to start the segment with. This steps also require the server to have open ports that can accept and initiate new connections. A ports acts as a virtual endpoint that allows multiple services to run on the same device while keeping the communication organized.
-
Step 3 (ACK): Both client and server establish a connection and will begin the data transfer.
This is not to mention TCP/IP Model contains 5 layers:
-
Application layer (what service you are using: web or email for example)
-
Transport layer (reliable (TCP) or unreliable but faster connection (UDP) — mostly use for live stream, video calls)
-
Network/Internet layer (logical addressing for devices on a network)
-
Data link layer(error detection and correction for data being transmitted over a network)
-
Physical layer (transmits bits over a physical medium such as cable or wireless signal)
HTTP/S request
Once the TCP connection is established, let’s tranfer data! The browser will send a GET request asking for www.google.com web page. You can also send POST request to websites that requires something like entering credentials or submitting a form.
The server, which contains a webserver such as Apache will receives the request from the browser and passes it to a request handler to read and generate a response. The request handler is a program (written in ASP.NET, PHP, Ruby, etc.) that reads the request, its’ headers, and cookies to check what is being requested and also update the information on the server if needed. Then it will assemble a response in a particular format (JSON, XML, HTML). (Maneesa)
HTTP/S response:
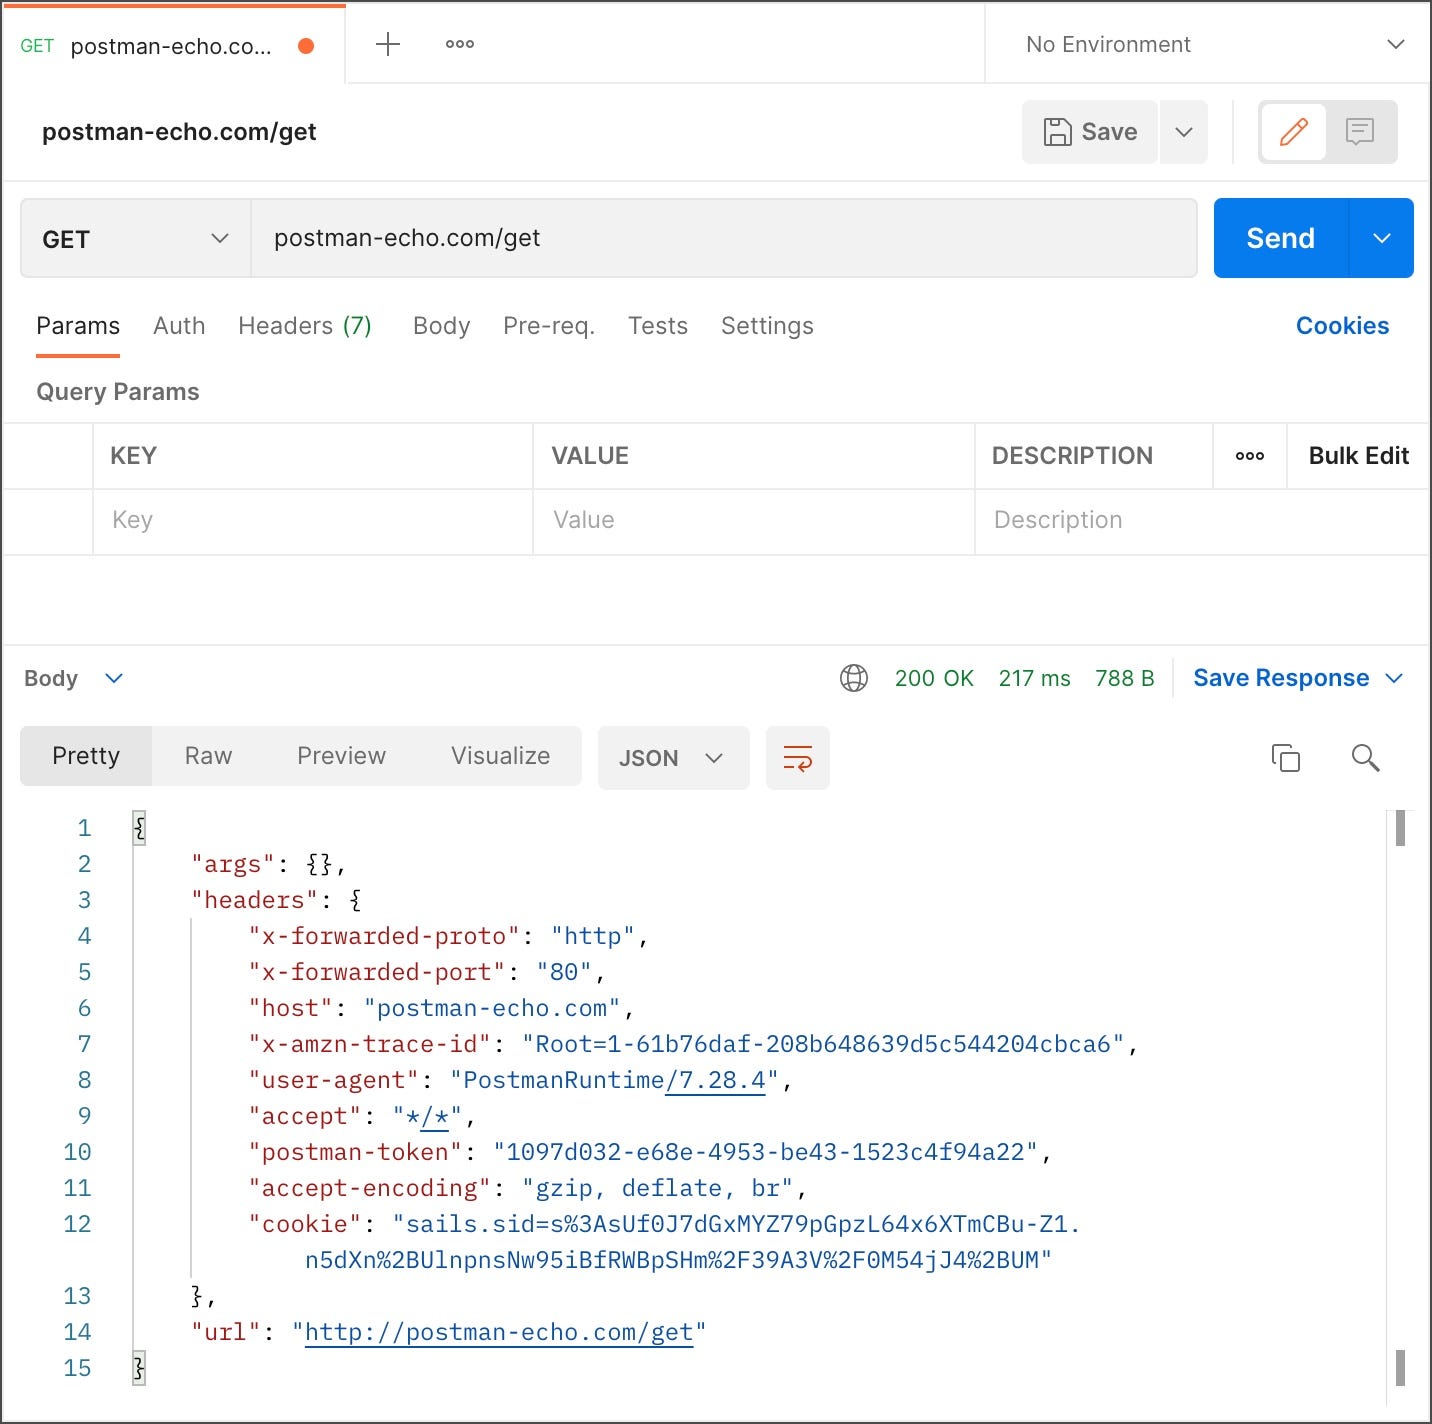
The server response contains the web page you requested as well as the status code, compression type (Content-Encoding), how to cache the page (Cache-Control), any cookies to set, privacy information, etc. (Maneesa)

If you look at the above response, the first line shows a status code. This is quite important as it tells us the status of the response. There are five types of statuses detailed using a numerical code.
● 1xx indicates an informational message only
● 2xx indicates success of some kind
● 3xx redirects the client to another URL
● 4xx indicates an error on the client’s part
● 5xx indicates an error on the server’s part
So, if you encountered an error, you can take a look at the HTTP response to check what type of status code you have received. You can also use Postman to check the status of HTTP response.
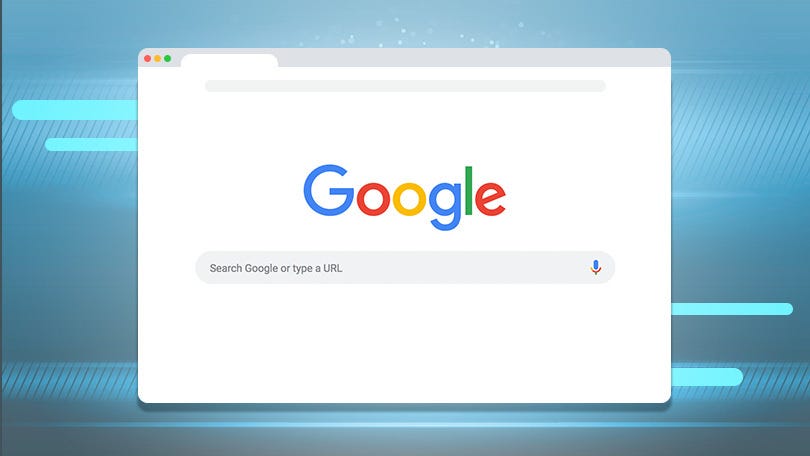
Displaying the HTML Content
The browser displays the HTML content in phases. First, it will render the bare-bone HTML skeleton. Then it will check the HTML tags and send out GET requests for additional elements on the web page, such as images, CSS stylesheets, JavaScript files, etc. These static files are cached by the browser, so it doesn’t have to fetch them again the next time you visit the page. In the end, you’ll see www.google.com appearing on your browser. (Maneesa)
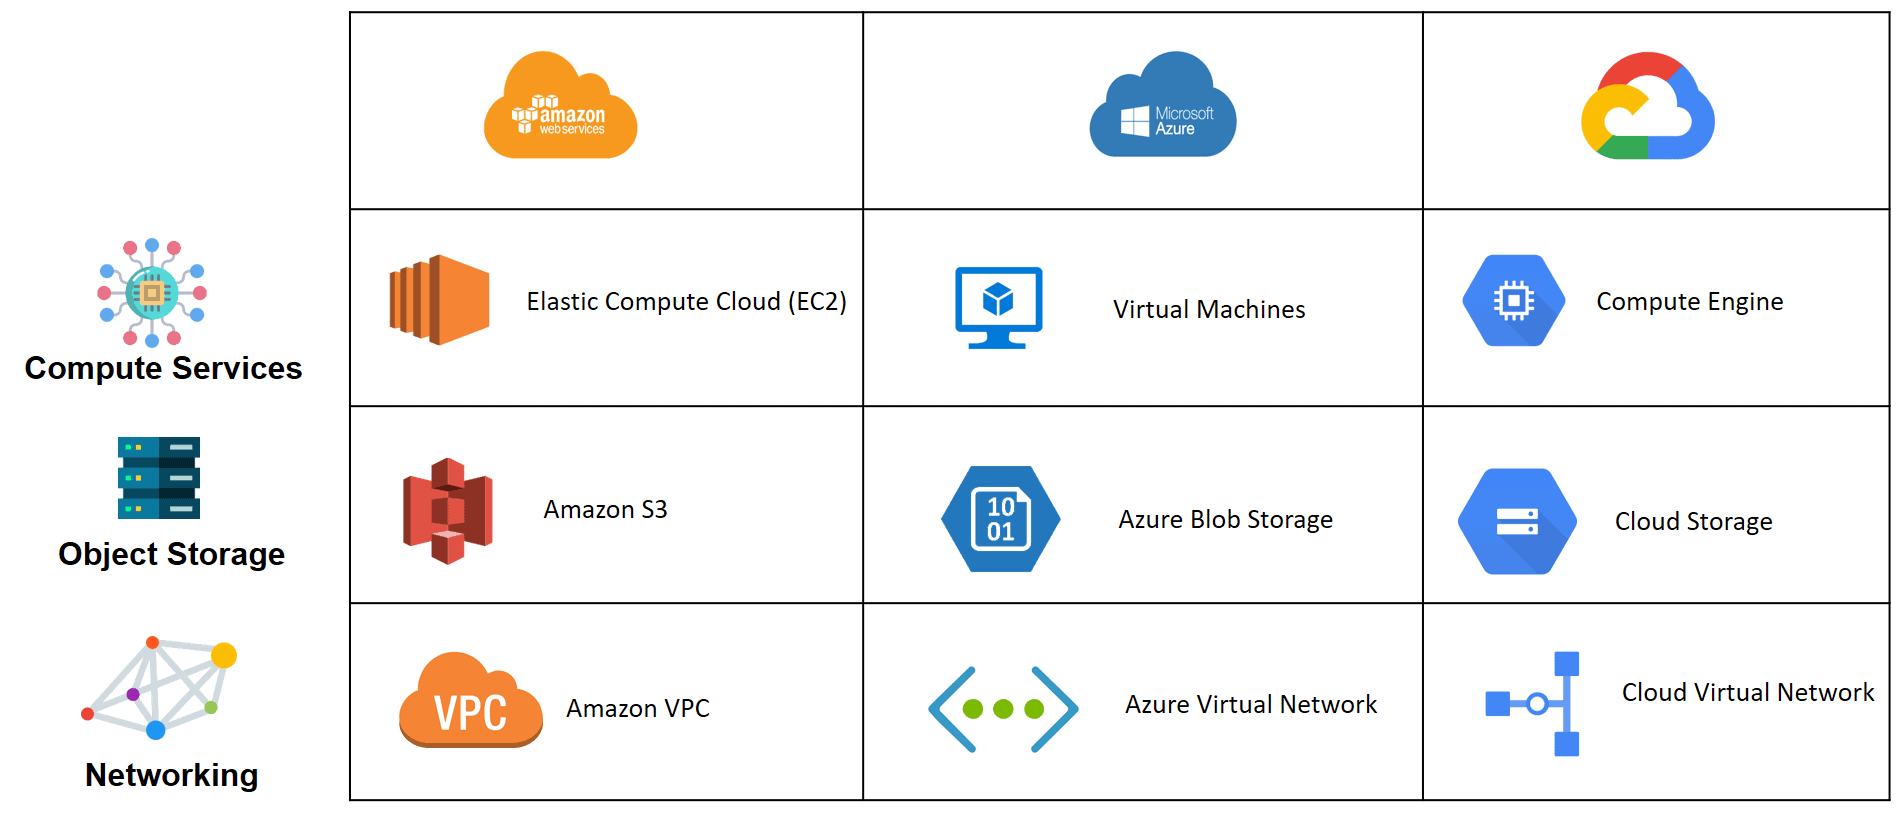
How we can use cloud services such as AWS/GCP/Azure, Terraform, Kubernetes, and Docker in this example?
Now let’s say you have built your own front-end with ReactJS/NextJS, pure JavaScript/HTML/CSS, etc. You want to deploy it on the Internet and get a domain so anyone can access your website online. I will keep these steps simple as our blog post is long already.

Step 1: Server
For every front end, you need a server to run your website online. Luckily, cloud providers such as AWS/GCP/Azure all offer automatic scaling so you don’t have to worry about scaling your website. (We will talk more about scaling — specifically
-
vertical scaling (scaling up): increase the capacity of a single resource, such as a server or a virtual machine, by adding more power, memory, or storage to handle increased workload or demand
-
horizontal scaling (scaling out): add more instances or copies of a resource, such as servers or virtual machines, to distribute the workload and increase the overall capacity
-
load balancing: a technique used to distribute incoming network traffic across multiple servers or resources to ensure efficient utilization and improve performance.
in another blog). This is not to mention add-ons feature such as analytics, and storage, database offered by these cloud providers.
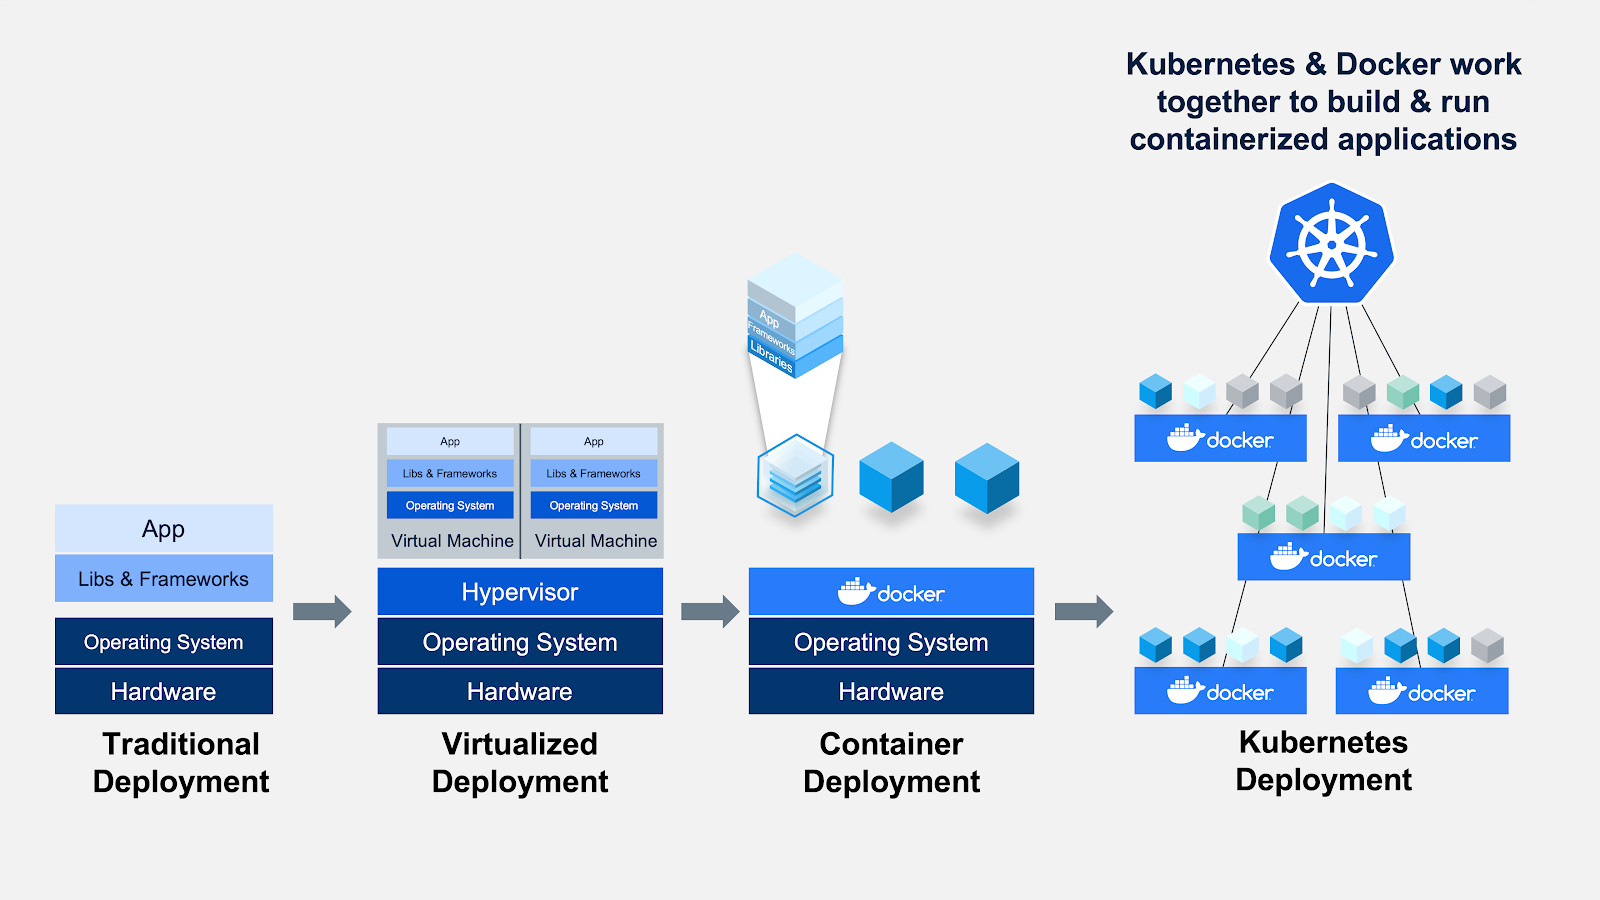
Step 2: Docker and Kubernetes
-
Docker: Docker helps you pack everything you need to build your front-end site including libraries and settings into a single container.
-
Kubernetes: Let’s say you have multiple containers, which hold your applications and distribute them across different computers called nodes. Kubernetes ensures that the containers are running correctly, monitors their health, and handles the situation if something goes wrong like crashing.
We use Docker and Kubernetes to package your application and deploy it on the server. It would require some DevOps skills to deploy a container onto the server.
More on DevOps
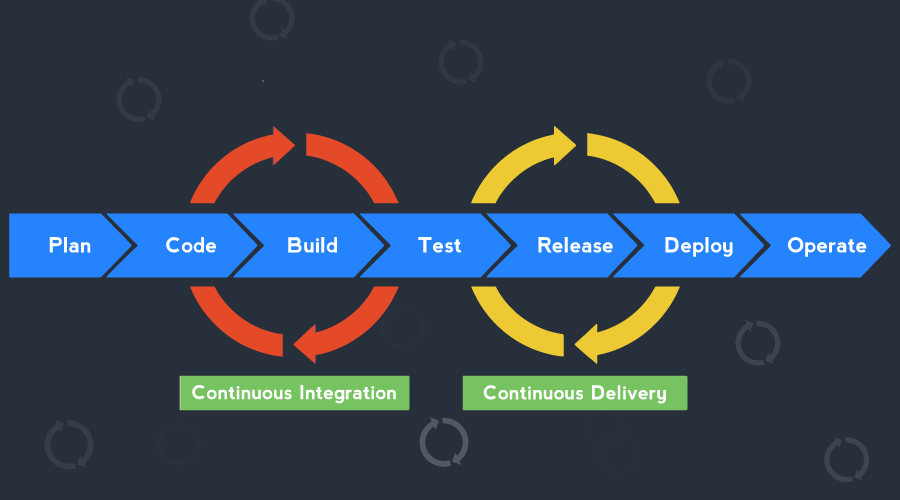
An example of DevOps CI/CD is when we push a commit to our desired Git and version control platform (Github, Gitlab, BitBucket, etc), which contains our
- Dockerfile (contains instructions to install and run the website like how we did with the front-end).
Example of Dockerfile
    # Use a base image
    FROM python:3.9-alpine

    # Set the working directory
    WORKDIR /app

    # Copy the requirements file
    COPY requirements.txt .

    # Install dependencies
    RUN pip install --no-cache-dir -r requirements.txt

    # Copy the application code
    COPY app.py .

    # Expose a port
    EXPOSE 8000

    # Set the command to run the application
    CMD ["python", "app.py"]
- Kubernetes file (YAML) to run the Docker image.
Example of Kubernetes file (YAML)
apiVersion: apps/v1
kind: Deployment
metadata:
  name: my-app-deployment
spec:
  replicas: 3
  selector:
    matchLabels:
      app: my-app
  template:
    metadata:
      labels:
        app: my-app
    spec:
      containers:
        - name: my-app-container
          image: my-app-image:latest
          ports:
            - containerPort: 80
---
apiVersion: v1
kind: Service
metadata:
  name: my-app-service
spec:
  selector:
    app: my-app
  ports:
    - protocol: TCP
      port: 80
      targetPort: 80
  type: LoadBalancer
We want for every commit pushed, the new version of the site will be deployed on the server automatically. Most cloud providers have their own CI/CD tool (AWS Code Pipeline, Google Cloud Build, Azure DevOps, etc.)
We can configure the stages into these steps:
-
Source: Configure CodePipeline to monitor your GitHub repository as the source and pull the latest code changes.
-
Build: Use a build stage (e.g., AWS CodeBuild) to build your Docker image based on the Dockerfile.
-
Test: Include testing steps in your pipeline to verify the integrity and quality of your application.
-
Deploy: Use a deployment stage to deploy the Docker image to your Kubernetes cluster. This stage will update the Kubernetes Deployment with the new image version.
Lastly, set up deployment triggers in your Kubernetes cluster to detect changes in the Deployment and automatically deploy the updated Docker image to your EC2 instance.
Step 3: Networking
Once the website is deployed on the server, the server will return a public IP address of the server. You can also access the website via this IP address.
Step 4: Find a domain
Buying a domain from sites such as CloudFlare, and Google Domain and connecting the IP address with the domain we just bought.
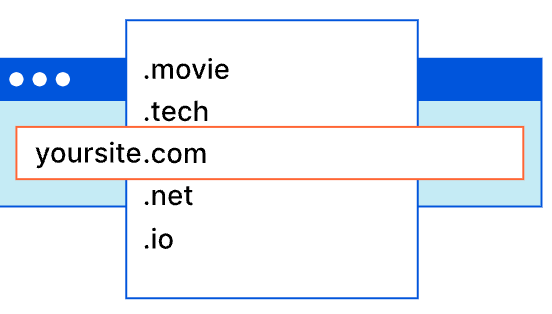
That’s it! Now everyone can access your website with this new domain you just bought.
Optional: Terraform
Most of the time, creating Cloud infrastructure such as servers, VPC, storage, etc., and connecting them all together as well as destroying them will take a lot of time. Terraform is an open-source infrastructure as code (IaC) that helps you manage and provision your cloud resources in simple a consistent way. We won’t go too much on Terraform today but with the configurations you have in Terraform, you can create and deploy those whole processes with just a few lines of commands.
Note: You might need VPC (Virtual Private Cloud) when working with Cloud providers. A VPC allows you to create a logically isolated section of the cloud where you can launch and connect resources like virtual machines, databases, and containers.
Example of Terraform code:
 provider "aws" {
      region = "us-west-2"
    }

    resource "aws_instance" "example" {
      ami           = "ami-0c94855ba95c71c99"   # Replace with your desired AMI ID
      instance_type = "t2.micro"
      key_name      = "your_key_pair_name"      # Replace with your key pair name

      tags = {
        Name = "example-instance"
      }
    }
Deploying your website is definitely a prolonged process. It makes me wonder how far we have come to have the websites loaded within seconds. I hope this article will help you understand more about the behind processes when we enter the URL into the address bar.
Feel free to like, comment or share this article if it was helpful:)
References:
Wijesinghe-Nelken, Maneesa. “What Happens When You Type a URL in the Browser and Press Enter?” Medium, 3 Jan. 2020, medium.com/p/bb0aa2449c1a.